Keeping track!

Daisypath Anniversary tickers
Showing posts with label Chilli. Show all posts

Thursday, November 26, 2009

Kimchi Sujebi & Fish’s Pork

So….

I tried my kimchi today and it has turned sour. Which is good. and i can make a lot of dishes with it now.

Two days ago, i made Kimchi Sujebi. Which basically means hand torn noodles in a Kimchi based soup.

This is also from Maangchi. (I think i shall place a link to her blog in my links)

DSC02274 
Looks good eh? Well.. as always, there were mistakes made from this and i definitely learned alot.

Ingredients (3-4 servings)

I’ve had to change the recipe Maangchi given for the noodles as mine just didn’t come together properly. So i searched around and found this. I will try this next time and let you guys know.

Noodles

2 cups plain flour
1/4 – 1/2 cup water
3 tsp cooking oil
Pinch of salt

Soup

10 cups water
1 1/2 cup chopped kimchi
6 tbsp kimchi juice
1/2 – 1 chopped onion
2 tbsp Fish Sauce (i only used 1/2 because i was afraid Fish might not like it, but i think it should be ok to add till 2 tbsp, try and see)
Soy Sauce, to taste
Hot Pepper Paste (Optional – if you don’t put this, try and see if its seasoning is ok, otherwise add more kimchi juice)
Sliced Green Onions

Optional Ingredients – These are stuffs i added and you can add whatever you like

3 hot dogs, sliced
2 pieces Oyster Mushroom
1 clove garlic

(I think thinly sliced beef might be a good addition)

Directions

Make the dough first.

Place all the dough ingredients in a mixing bowl and combine till it forms a dough. It won’t look very pretty now. It is not supposed to be a sticky dough, or maybe just slightly sticky.

Put it in a plastic bag and into the fridge it goes.

For the soup, combine all the ingredients in a pot. I would suggest to add the soy sauce and fish sauce when it starts heating up or even after you put in the noodles, so you can season to your taste.

*The thing here is, you have to be fast with the dough. Since it was my first time, i made mistakes with the dough and i took very long for all the dough to get into the pot, so instead of a soup, i ended up with a thick stew. Which is still nice, but… so, if you’re going to be slow, switch off the fire after it has boiled and concentrate on your dough first.

Hopefully the dough might be in the fridge for at least 15 mins to 1/2 hr.

Take the dough out and you have to knead it.

For convenience sake, since it’s a relative small piece of dough, knead it on a chopping board, it makes my life way easier. You will notice the difference as you knead, your dough should become more elastic, smoother and shinier.

When you kneaded it approximately enough, what you do now is switch the fire back on to the lowest fire. Holding the dough in your left hand, stretch out a piece of the dough to form noodle. It’s not strips of noodles, but rather pieces of noodles. So, what you want is to stretch it as thinly as possible. Don’t worry about breakage or ugliness – adds to the charm.

Do this for the whole dough. Practice makes perfect, towards the end, i was very good at stretching out and making the noodles.

Consistently stir to incorporate the noodles into the soup and don’t let it come to a boil if you know you’re going to be slow with the dough. I ended up with some nice and chewy dough but also some mushy ones which were obviously not as good.

Taste and see if it’s salty enough or flavourful enough. Mine wasn’t quite flavourful enough, so i added 2-3 tbsp of kimchi juice and maybe 1/4 cup soy sauce. But… be careful of the soy sauce as it has a tendency to overwhelm the kimchi. I would try adding salt next time instead.

Conclusion: It tastes really good, but can get really spicy when eaten both spicy and hot from the pot. and it’s so versatile that you can add whatever ingredients you have on hand that you think might go well with kimchi and the whole flavour. Experiment wisely.

DSC02272 
This is something really tasty that Fish made for dinner the same night. It was just a pack of thinly slice pork with 1 slice of bacon. Fried with onions and green onions and seasoned. It tasted really really good. A very very nice side dish to make up for the lack of meat in the sujebi.

Thanks to Maangchi and i can’t wait to see what i will be making next!

Monday, November 23, 2009

Kimchi! Easier than Pie.

Looking at my camera, i realise that i actually have loads of things i have yet to blog about. So, i shall start with this. KIMCHI!

As you all should know, Kimchi is an integral food in Korean food culture. and before i actually read about it, it always seemed like something really far out and near impossible to make by yourself – something that should be eaten at restaurants or bought in a bottle.

But. it is really simple. really simple. and the ingredients are easy to get as well. So.. let’s start shall we?

DSC02256 

I’ve recently gotten into a Korean food craze after watching Maangchi’s youtube channel. She teaches how to cook Korean food. She also has a blog. This recipe is from here. I’ve only made minor tweaks here and there to suit our tastes. and that’s the best part. You can change it to suit your own taste instead of letting others decide what you should taste.

Don’t be frightened by the list of ingredients. I’ve broken it up into 4 parts so that it’s easier to follow.

Ingredients

Part 1

1 Whole Chinese Cabbage
1 cup Sea Salt

Part 2

6-7 cloves of garlic (you may use lesser, i LOVE garlic)
1 inch Ginger
1/2 onion
1/2 apple

Part 3

1/4 cup Sweet Rice flour (aka Glutinous Rice Flour)
1 1/2 cup Water
<1/8 cup Sugar

Part 4

2-3 cups of Korean hot pepper flakes
5-7 stalks of Green Onions (could be a mixture of green onions and chinese chives)
1/2 cup Fish Sauce


Directions

Salting

Taking the whole cabbage – mine were already halved. Slice the cabbage into half and then quartered. Slice only into the core and gently pull apart, instead of slicing into the leaves.

Place them in large containers. I didn’t have much large containers, so i just used a pyrex baking dish (which worked really well) and a large serving plate.

DSC02246 
Sprinkle salt liberally into each leaf section, placing more salt on the inner stems. Repeat for all 4 portions.

Leave to cure for 4 hours, turning them around halfway or as necessary.

Go have fun for 2-3 hours.


Making Kimchi Paste

After resting for 2-3 hours, get your knife and chopping board ready for prepping the other ingredients.

In a small pot, heat the Glutinous rice flour and water mixture. (Part 3) It will slowly heat and thicken, keep stirring constantly. When it begins to bubble, add in the sugar. Mix well and when sugar melts, take it off the fire.

Leave aside to cool. or pour into a LARGE mixing bowl to cool.

Meanwhile, in a food processor, place Part 2 of the ingredient list in and mix till a mushy paste. Leave aside.

After the flour paste has cooled down considerably, add in the mush from the food processor, and the ingredients from Part 4. Stir and Stir to combine.

DSC02247 
Washing Time

By now, it should be approximately 4 hours since your cabbages have been salting. It’s time to wash the cabbages.

The easiest and fastest way to wash these is under running water. Place each cabbage under running water letting the water do the job of rising the salt off the cabbage. Wash each and every leaf. I did this twice for each cabbage. Squeeze the excess water out of each cabbage. Just squeeze.

DSC02250 
See the difference in the size of the cabbage. It should now be in a way more manageable size. Try to squeeze as much water as possible out of the cabbages.


Rubbing in the paste

Now comes the final part.

Wearing gloves please.

Taking each cabbage, place into the LARGE mixing bowl leaves on top.

Taking an amount of paste with your fingers, place them into each leaf. Finally rub some paste on the outsides of the cabbage and place nicely into a container. Repeat.

DSC02257
I managed to squeeze them into my new Ikea plastic containers. Leave covered at room temperature for a day or two. (i left mine for one) and place in the fridge where it will continue to ferment.

DSC02260 
The next day, i checked up on it and this is what i found. See the bubbles at the top right hand corner of the container. This means that it is fermenting. And the water that surrounds the kimchi is known as Kimchi Juice.

Kimchi juice is used in cooking as well, so it’s not going to be wasted.

AND!

There you have it! Your (Mine) own homemade Kimchi!

DSC02265
I sliced up half of a Kimchi for dinner. Tastes great. Just one small problem.

Hehe.. in Maangchi’s original recipe, she also made Radish Kimchi which i obviously didn’t, but i had used to same amount of paste. Therefore, my kimchi was very ‘rich’. Loads of paste on each leaf. =) I will remember to reduce the amount the next time i make kimchi.

The recipe above is as how i made it. Feel free to reduce the amounts for making the kimchi paste. I didn’t do that for you guys as i’m not 100% sure of how much i would reduce. So go rely on your intuition. and have Fun!

Other than merely eating the Kimchi on its own, it can also be made into other dishes. I have so far made one for dinner tonight and it’s called Kimchi Sujebi aka Hand torn noodle soup.

I shall post that tomorrow and i made mistakes with that which hopefully you guys can learn from my mistake and not go down my path.. although it still tasted great. =)

Kimchi On!!

Saturday, August 08, 2009

Remember my Chilli from the previous post? + 3 onion Oil

This is the first time my chilli has been used in a dish which was wonderful!

We love our green beans – or short long beans.

So fish suggested that we should fry the green beans in my chilli paste. So, here goes.

I fried the green beans in the 3 onion oil.

I think i’ll give you guys the recipe for the 3 onion oil which i learnt from youtube – a chinese cooking show.

Ingredients

Spring Onions (only the white section) – sliced into long sections
Shallots – sliced
Brown onions – sliced
Olive/Vegetable Oil

Directions

In the appropriate amount of oil in a saucepan, add the 3 different kinds of onions. Cook till fragrant or until the onions turn a slight brown and take it off the fire – remember that it will continue to cook, so don’t overcook it. We only use the whiter portions of the spring onions for the green parts contain more water which will cause the oil to splatter!

After it cools, place into a bottle or just a bowl and store in the fridge. It will turn white like wax when cold – you can just scrape and place into the dish you’re making. It also dissolves back to oil really fast.

I always add the onions into my dish as well – just not the spring onion cause they’re really long.

You can also use this oil for whatever you’re cooking. I used this oil to fry a simple fried rice to add flavour.

This was really simple as well. I don’t remember the exact ingredients used but i think i can give you a list.

Ingredients

Big spoonful of chilli – or how spicy you like it
Sake – or any cooking wine – just a little to add sweetness and fragrance
Dark Soya Sauce – so that when it reduces it creates a sticky caramelised texture for the chilli to stick
Light Soya Sauce – for seasoning
3 Onion Oil

Directions

Fry the green beans in the onion oil till they’re slightly softened. Add the ingredients in whatever order you desire. Just be careful as the sake splatters slightly, but a little is enough.

Fry and Fry and taste if you’re happy with the saltiness and spiciness and if the raw veggie taste has left.

I can see this as a dish that i will be cooking often cause it tastes great!

Oh, this actually went well with fried spam (luncheon meat) bits. =)

Simple Homemade Chilli with no Shrimp

Well… i’ve been wanting to make my own sambal chilli for the longest time ever but never got the chance to. So now, i have.

The only thing is – it’s vegetarian. Fish does not like seafood, so there is no he bi (little dried shrimps) and belachan. It is just a really simple chilli.

There are also some changes to the ingredients.

Ingredients

15 big red chillis
10 chilli padi
Enough onions
Enough Ginger and Garlic

Directions

Okay. The ingredient list is slightly vague. In Singapore, we would have used small red onions called shallots here. However, these are expensive here so i used big red onions instead and added a white onion for sweetness.

Also, ginger and garlic is necessary to make it fragrant because of the lack of shrimp, so make sure you use a substantial amount of that.

I followed my grandmother way of measurement. Take a normal rice bowl. At the end after blending, my was about 3/4 onions and 1/4 garlic ginger. If you add a bowl of this mixture, you should also be adding a bowl of chilli paste. Give or take. It doesn’t have to be accurately measured, don’t worry.

The big red onions as i have found out, release a lot of water. Therefore, it takes time to fry.

In a big frying pan, add oil. I added my 3 onion oil (i haven blogged about this – have i? i will after this) and added the onion ginger garlic paste and fry till fragrant. Add the chilli paste after this and just keep frying and frying and frying and frying until the whole paste dries up into a slightly stiff paste and changes color to a slightly darker shade. Fry it till as dry as you like – mine wasn’t ultra dry.

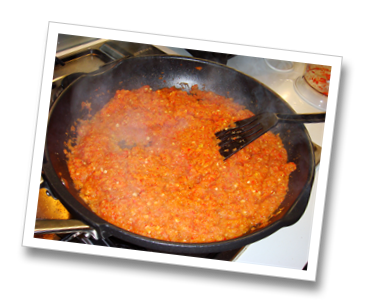
This picture is when i first started frying – notice the amount of liquid and bright redness. Keep frying till if all comes together and end up like something you know or like the first picture above.

Obviously this is my first attempt, it turned out well but i think i will add more ginger and garlic next time to make it even better. You can experiment with different proportions of the different ingredients and create your own secret recipe!